How I built a Powerbox
I recently had a power outage which lasted 10 hours here at home. It was not pleasant sitting the dark with just a flashlight. I knew I had to build a power box, a device which provides a variety of input leads from a battery. This article details what how I designed and built a power box for simple applications such as powering lamps, charging phones, laptops, and powering my ham radio.
Design and Planning
The materials I used for the power box were specific to my power needs. I optimized for reducing time to construct the power box at some extra cost. Additionally, I used existing tools I had around. What I discovered is the total price of this power box was less than buying a pre-made one of equivalent power.
Battery
The needs for my battery were
- Minimal EMI/RFI (Electromagnetic Interference/Radio-Frequency Interference) so I can operate a ham radio well.
- Can power lamps, charge phones, and laptops.
- Enough power stored more multiple days of continuous use without charging.
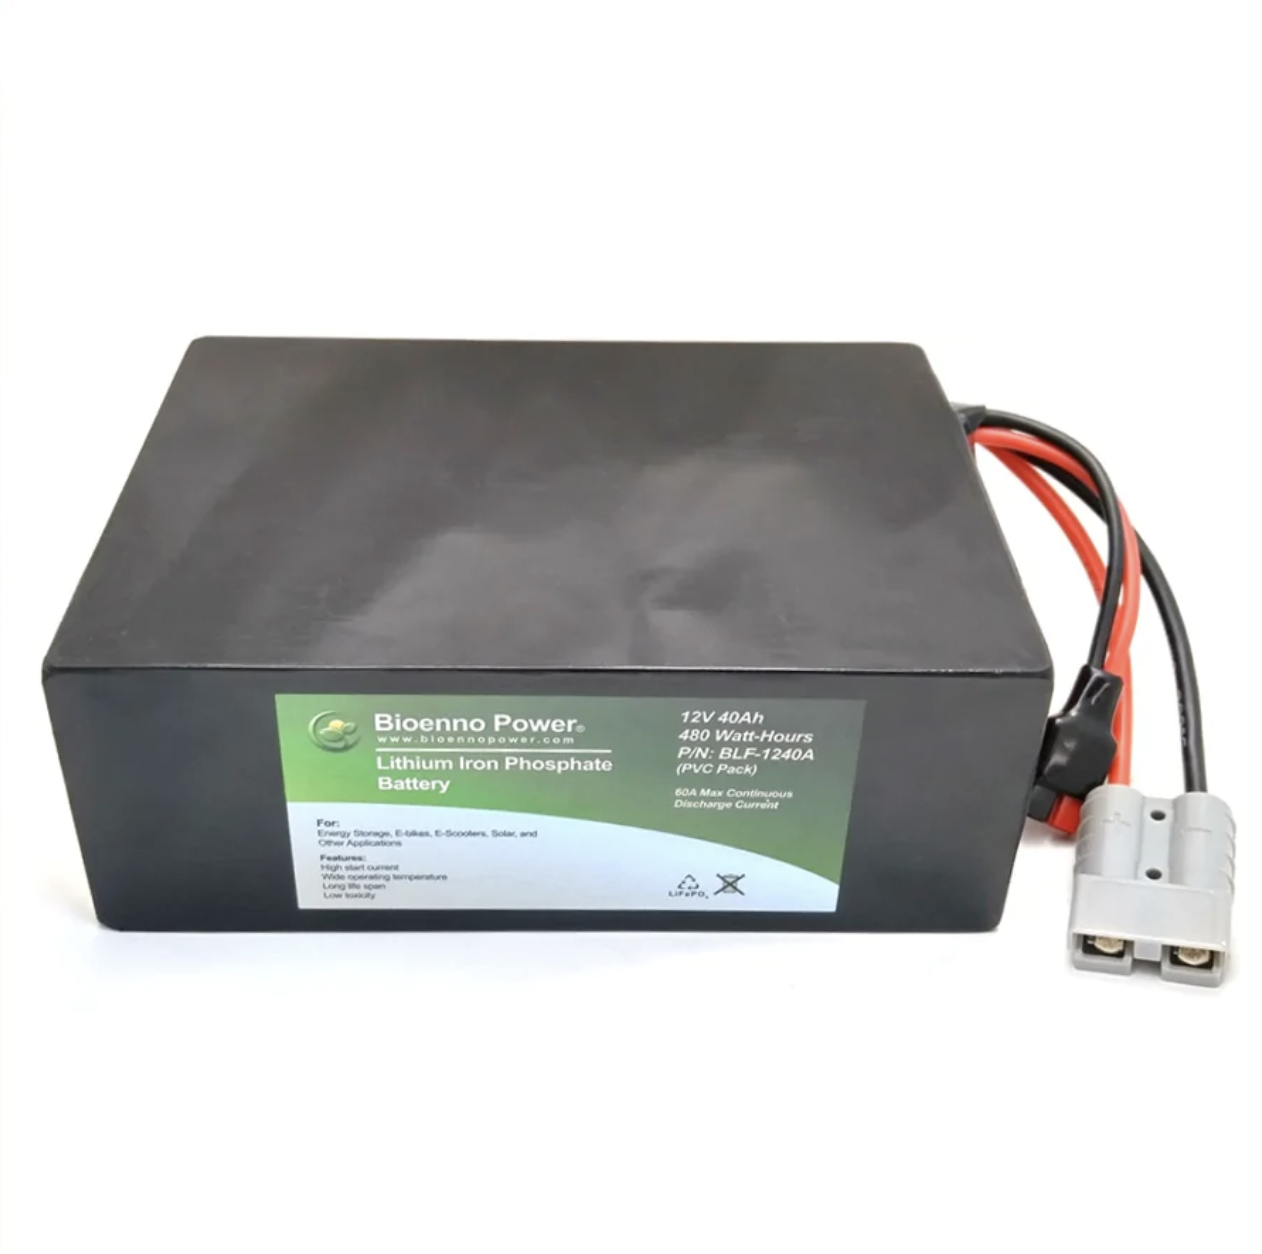
The size of the battery I got was a 12v 40Ah LiFePO4 battery which supplied me with 480Wh. This deep cycle battery has a large capacity and a very high life cycle. Additionally, this battery chemistry is well designed for solar applications too!
I got my battery from Bioenno. There are some great features with this battery, first being it has minimal EMI/RFI. Additionally, the battery comes with Anderson power pole connectors. The larger connector is for supplying electricity, and the smaller connector is for charging. Anderson powerpoles are a great connector for electronic projects like this.
Solar Panels
Knowing the battery I am using infers how large my solar panels could be. The spec sheet for the battery I chose says the maximum charging current is 6A.
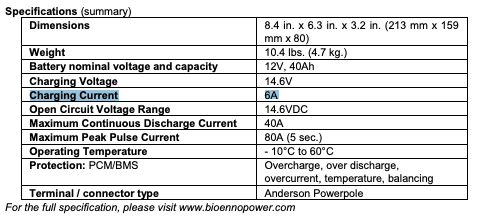
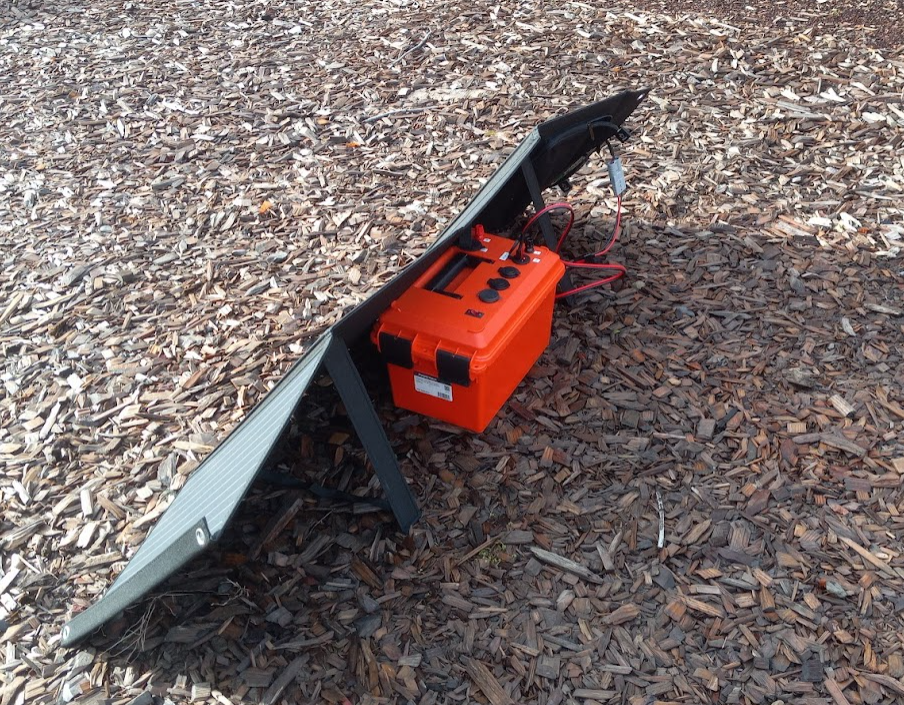
I opted for Bioenno’s 100 watt solar panels. These foldable panels supply a maximum of 5.56A, which is under my battery’s 6A limit. Additionally, these panels come with Anderson power pole connectors, making the system easy to assemble.
Solar charge controller
Knowing the panels I was using helped me decide which solar charge controller to get. I needed a solar charge controller to connect the solar panels to a battery. This controller should be able to handle at least 6A of current from my solar panels.
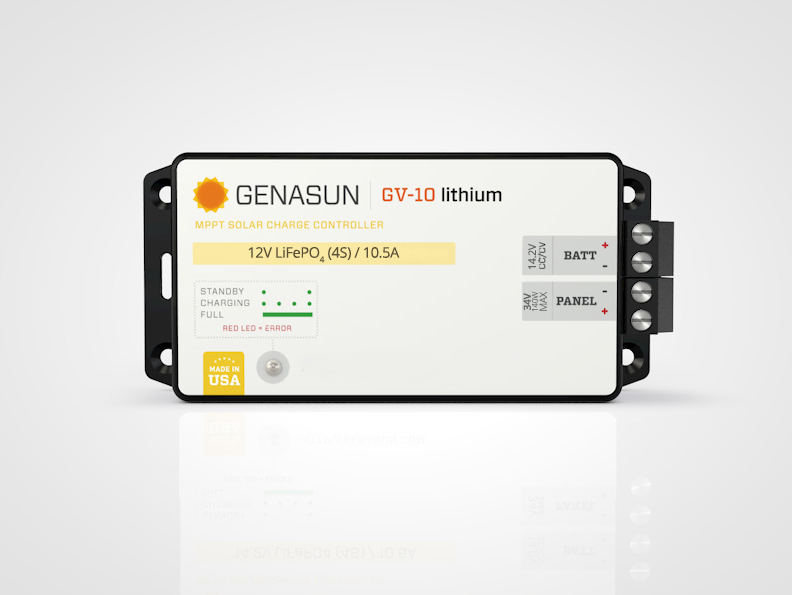
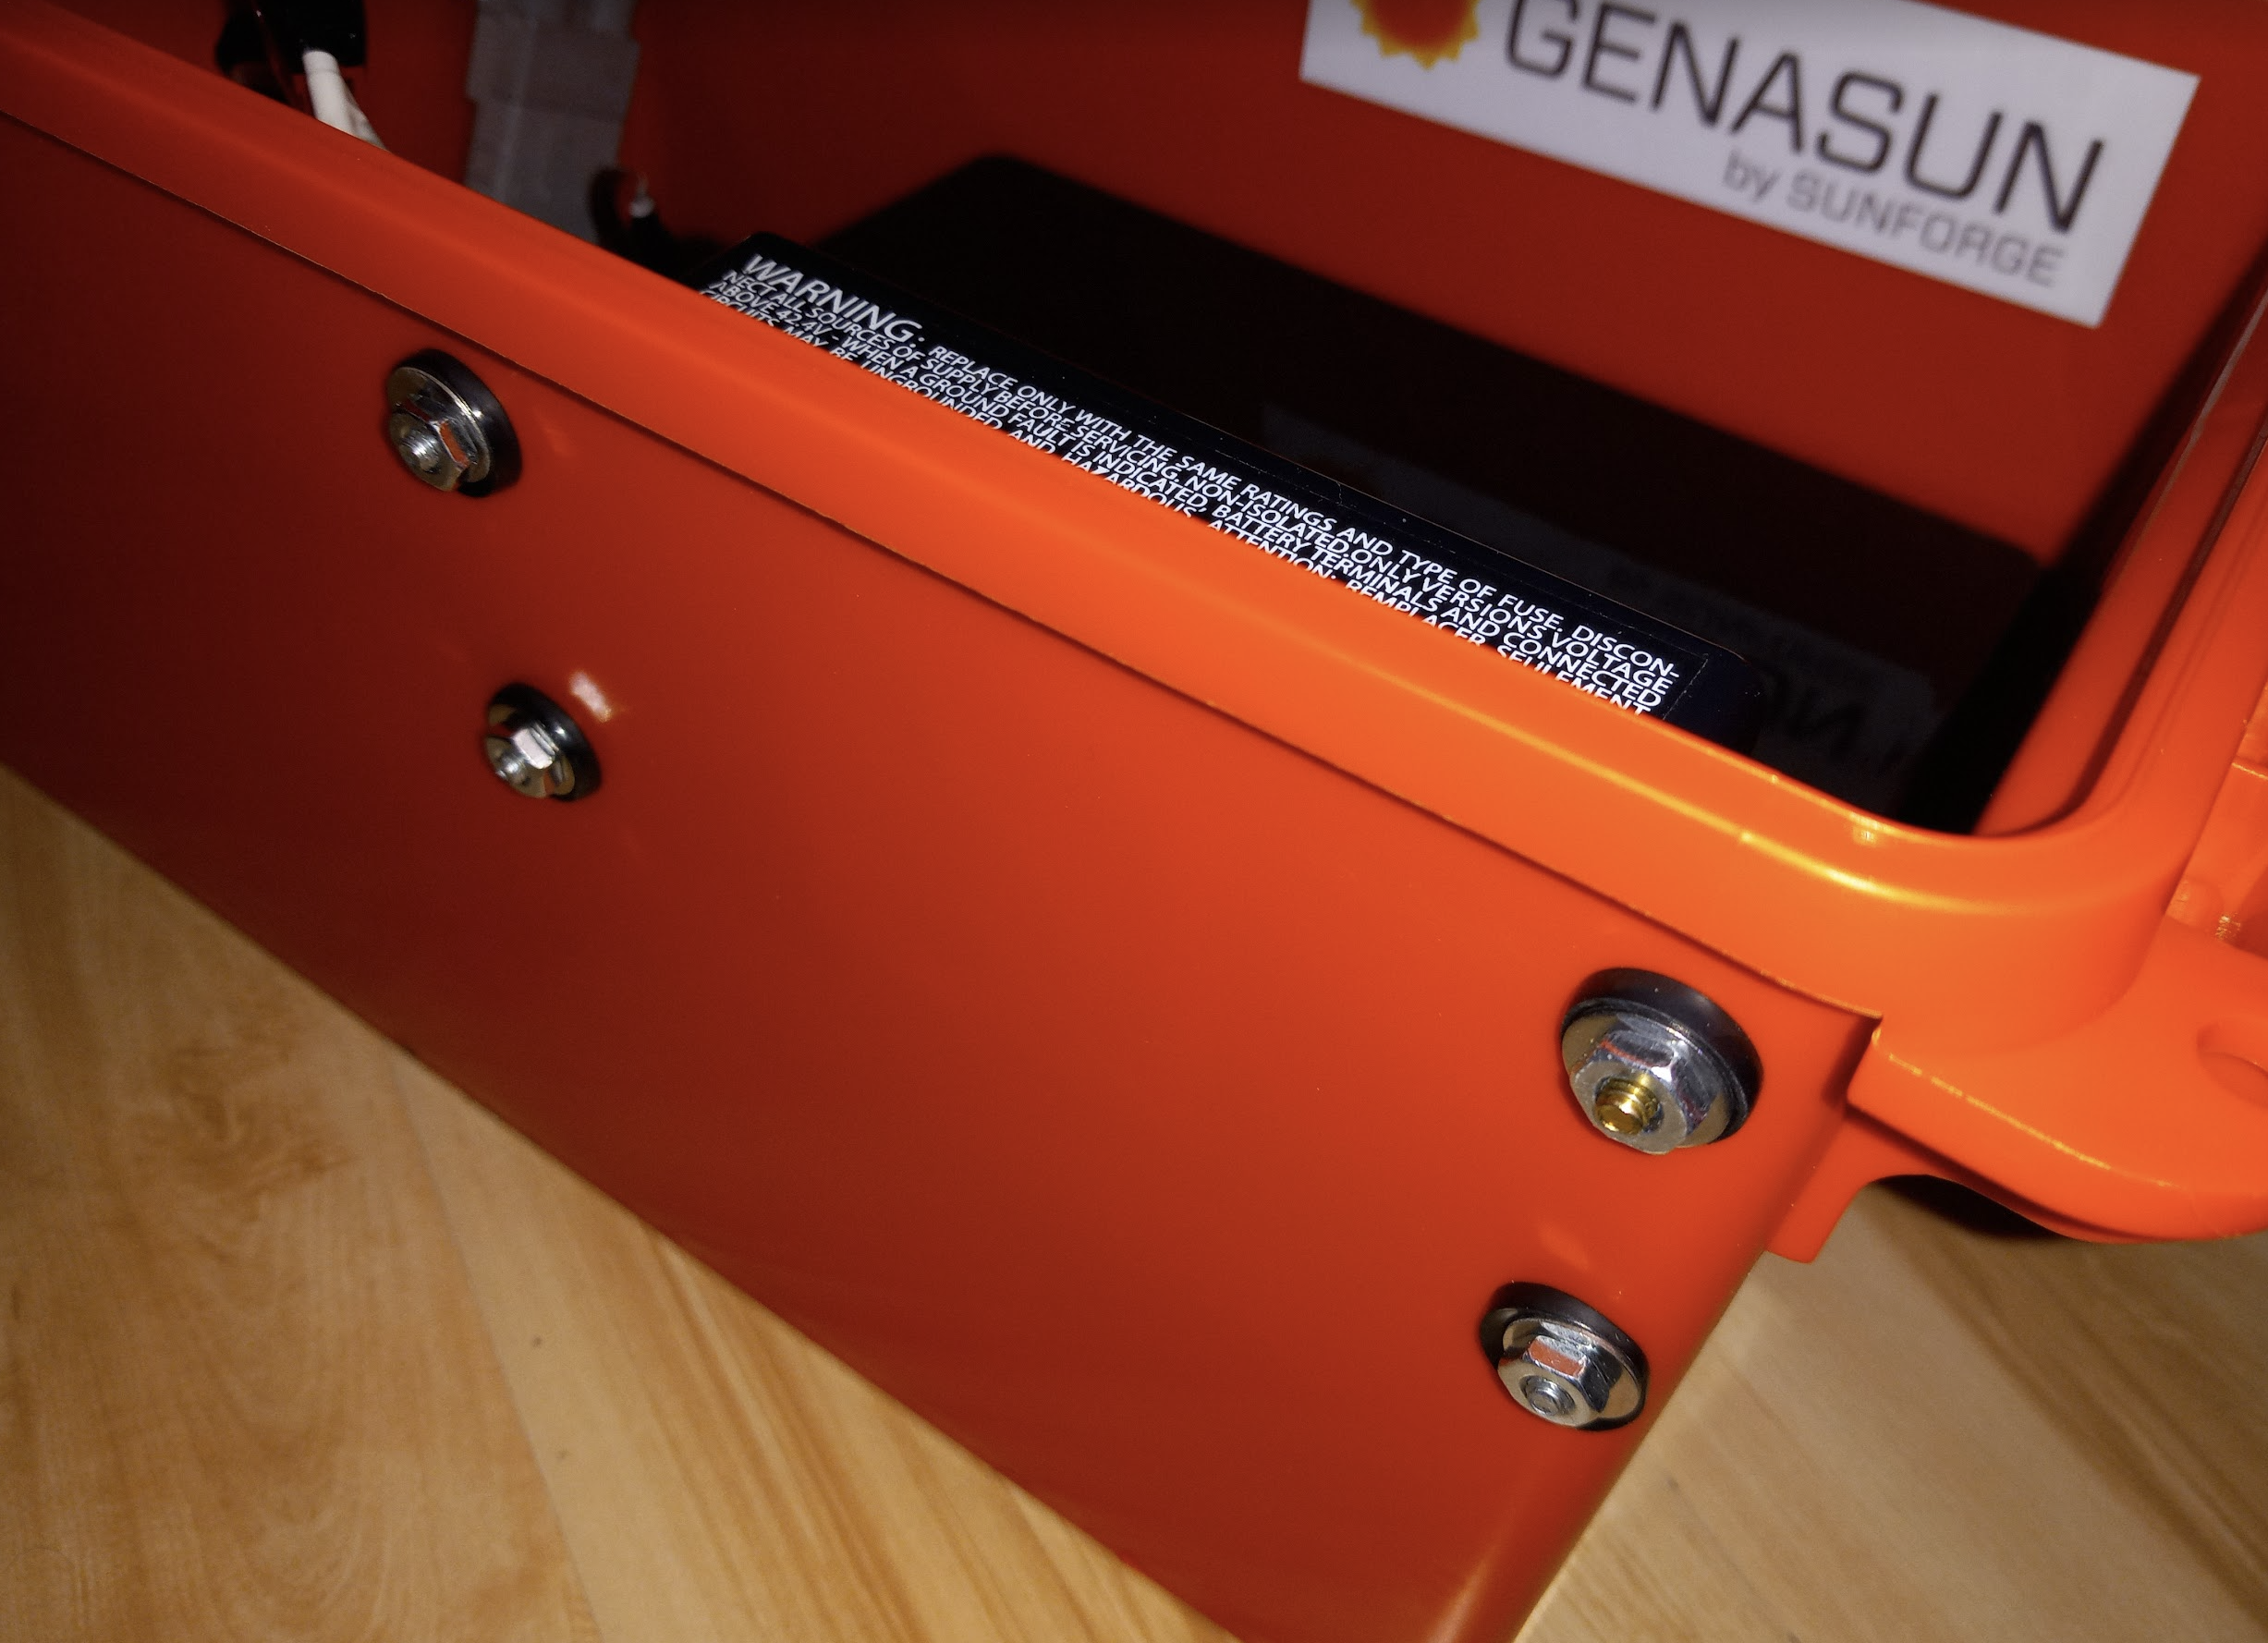
I decided on a GV-10-Li-14.2V lithium solar charge controller from genasun. This solar charge controller is made in the USA, can handle the power output from my solar panels, and can charge LiFePO4 batteries too.
I got a slightly oversized solar charge controller because I knew I may build a larger battery system later, and I would like to reuse as many components as possible.
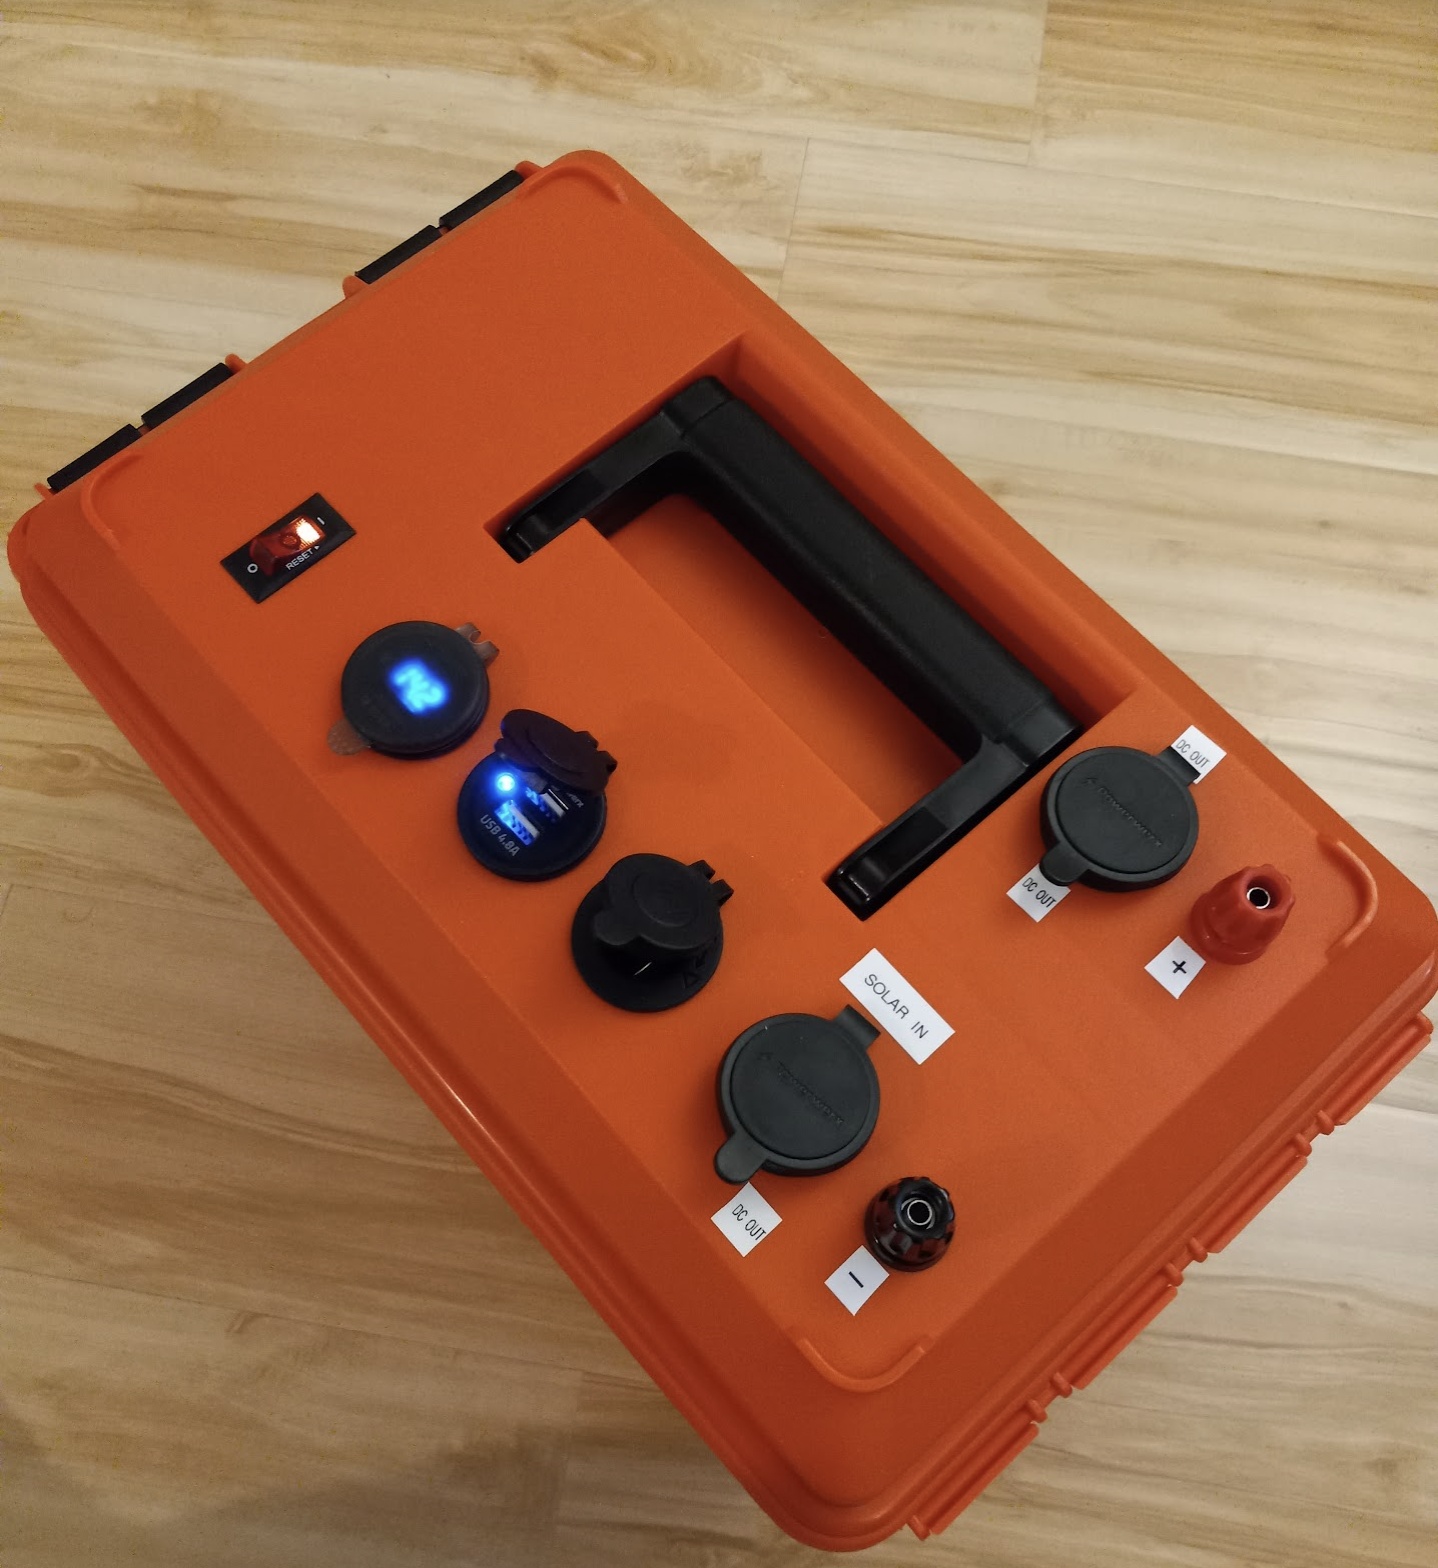
Power box
Here is the shortcut I took. Rather than buying individual components to build the box, I decided to get a pre-made box that had a lot of built in components already. The cost of all the components, wires, connectors, and the box individually would be just about the same as buying a pre-buitl power box.
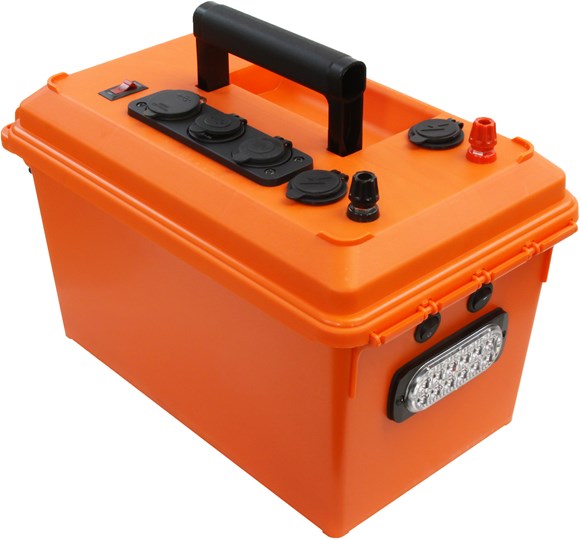
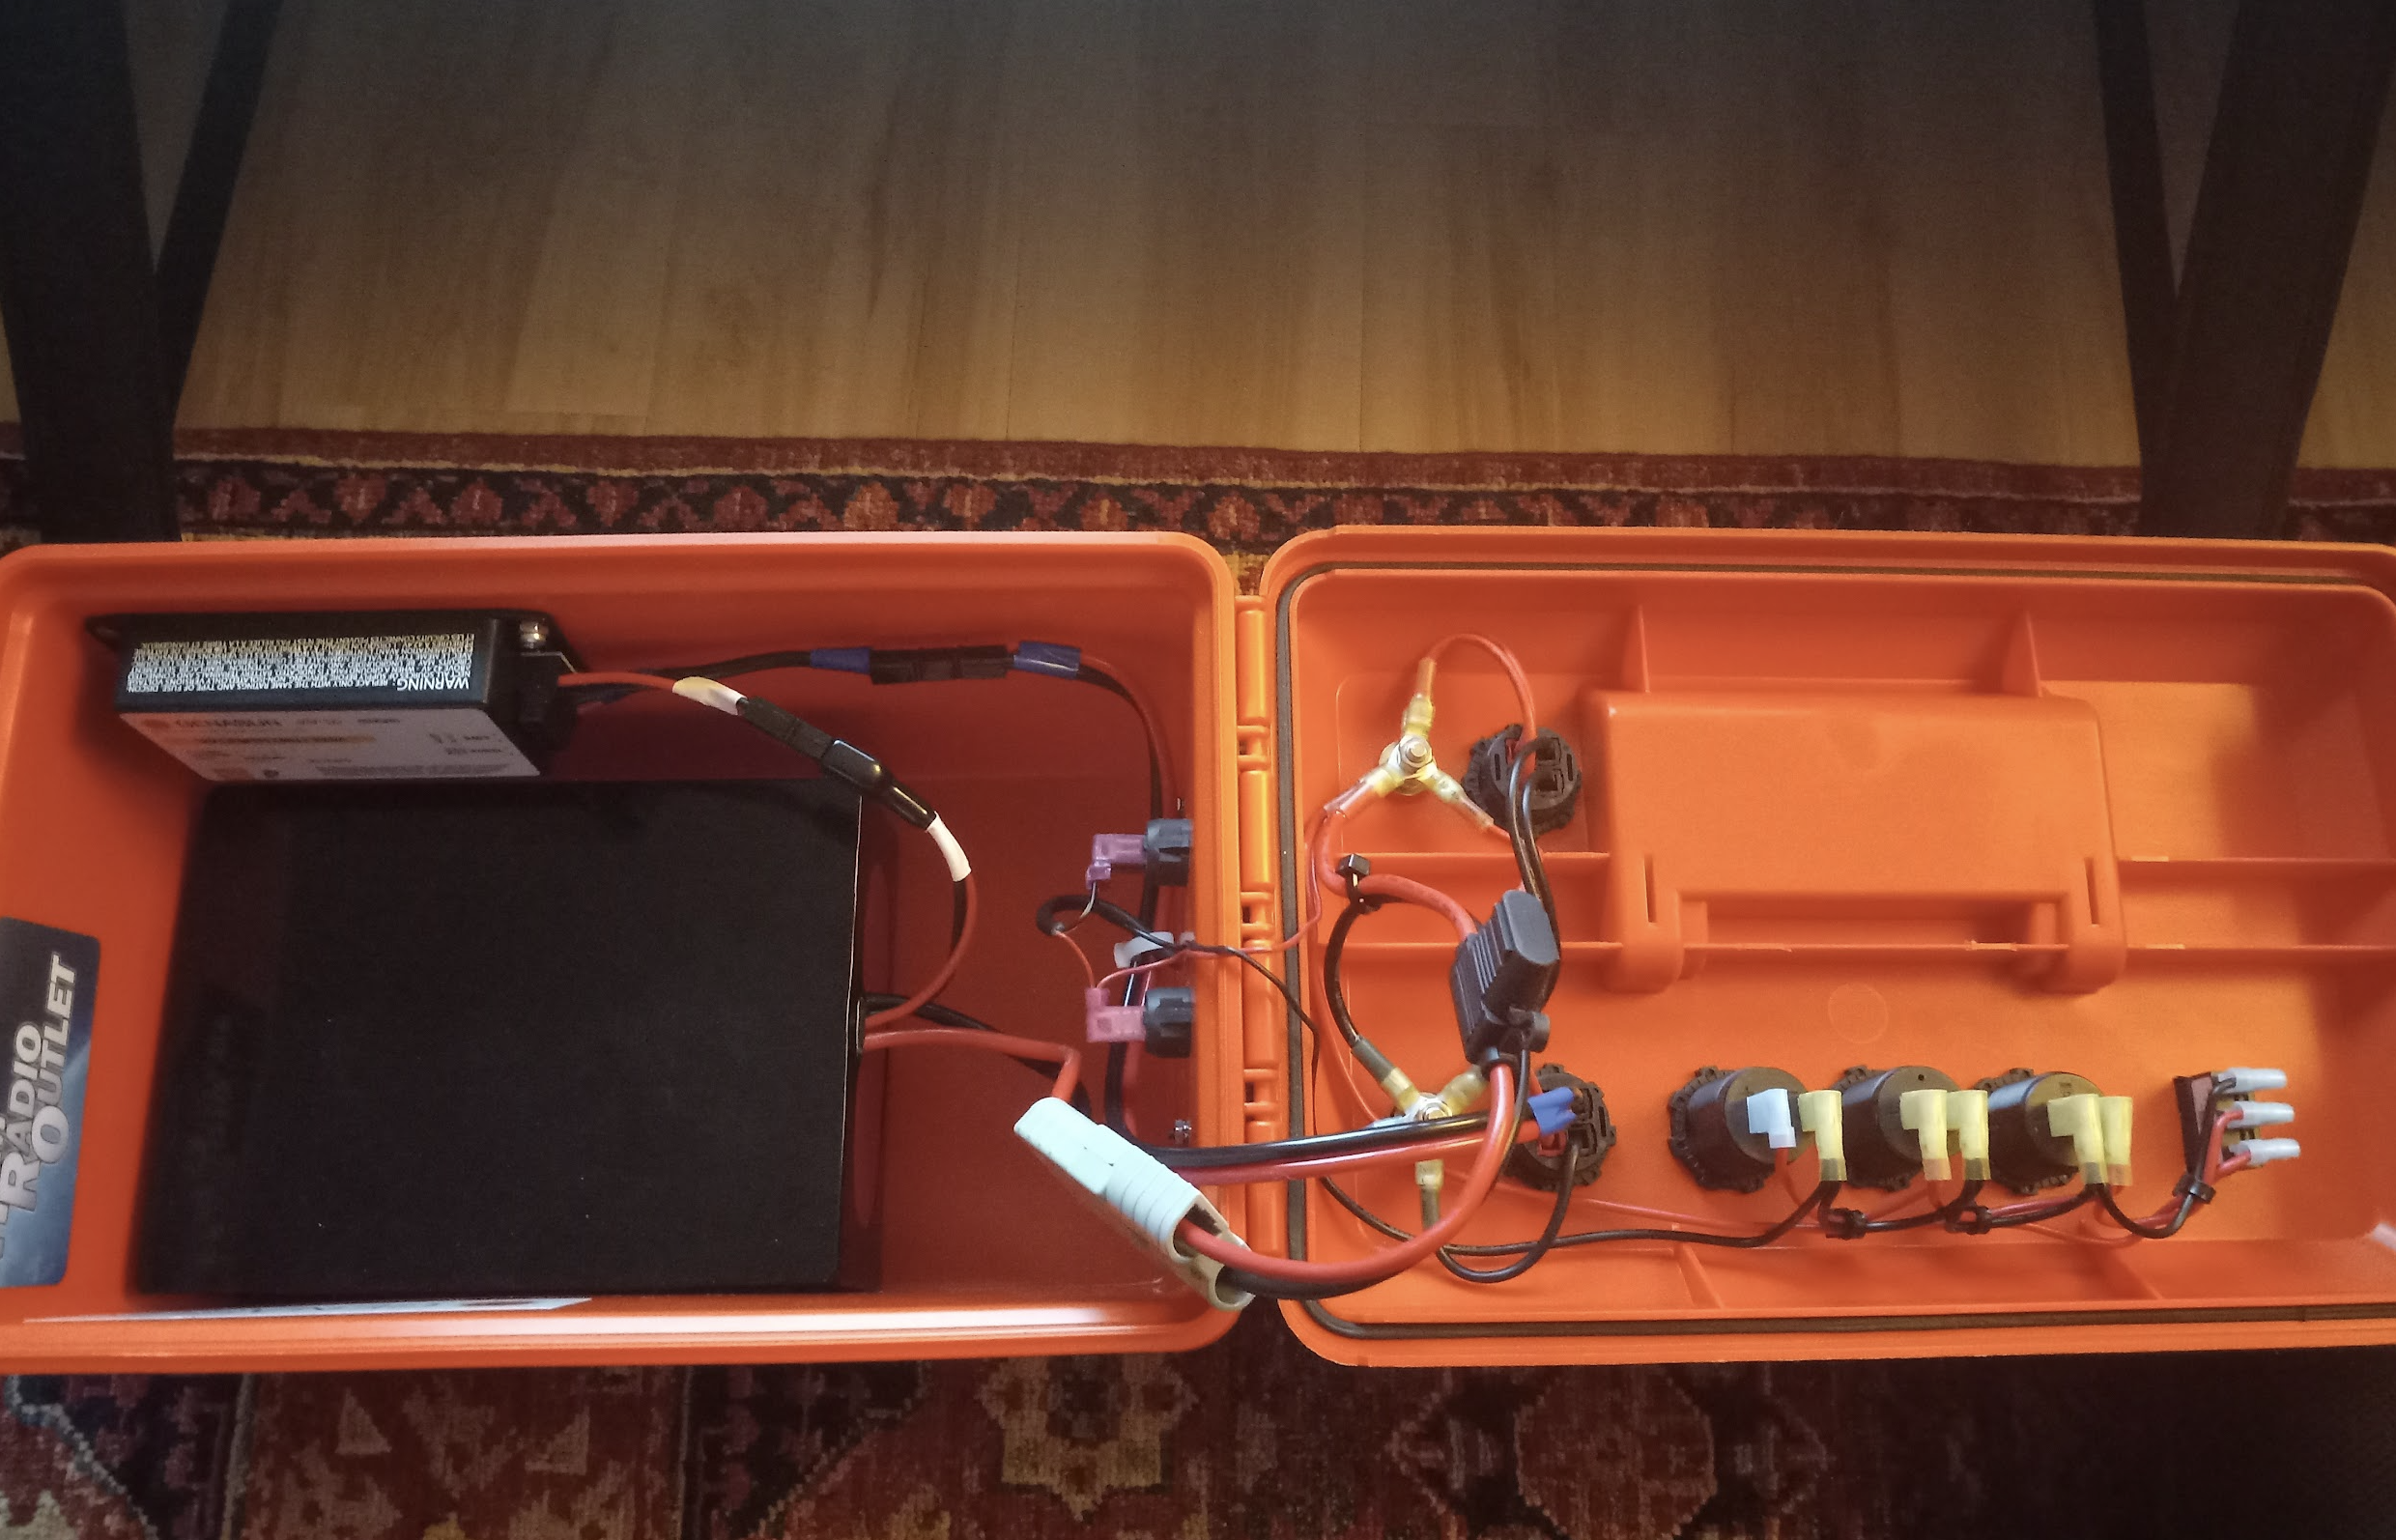
The powerwerx megabox fulfilled my needs perfectly. It could fit my solar charge controller and battery inside well. Additionally, it has the USB inputs for charging small devices and Anderson power pole DC outputs for powering inverter or my ham radio.
Building the Power Box
The wiring for the power box is very easy. I had to create a couple cable splices, but I used tools I had available for this.
I tried to use 10 AWG (American Wire Gauge) for all the cables. This avoids any significant voltage drops, and allows me to handle up to 85A. You could get by with 12AWG for this box, but I wanted to minimize any power loss due to heat.
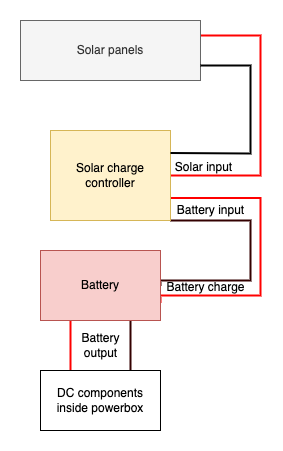
The first step was rewiring one of the Anderson power pole outputs on the box to a DC input for my solar panel. This way I could connect the solar panels from outside of my box.
I also mounted the solar charge controller to the side of the box. I used some nuts, bolts and washers I had laying around. I also got some rubber washers from the plumbing section of home depot to ensure a water tight fit was made in this area.
And that’s about it for modifications I made to this box. There is some extra space at the top of the box for one more module, and one day I will put something there.
I also have a small pure sine wave inverter so I can plug in small AC powered equipment or charge laptops.
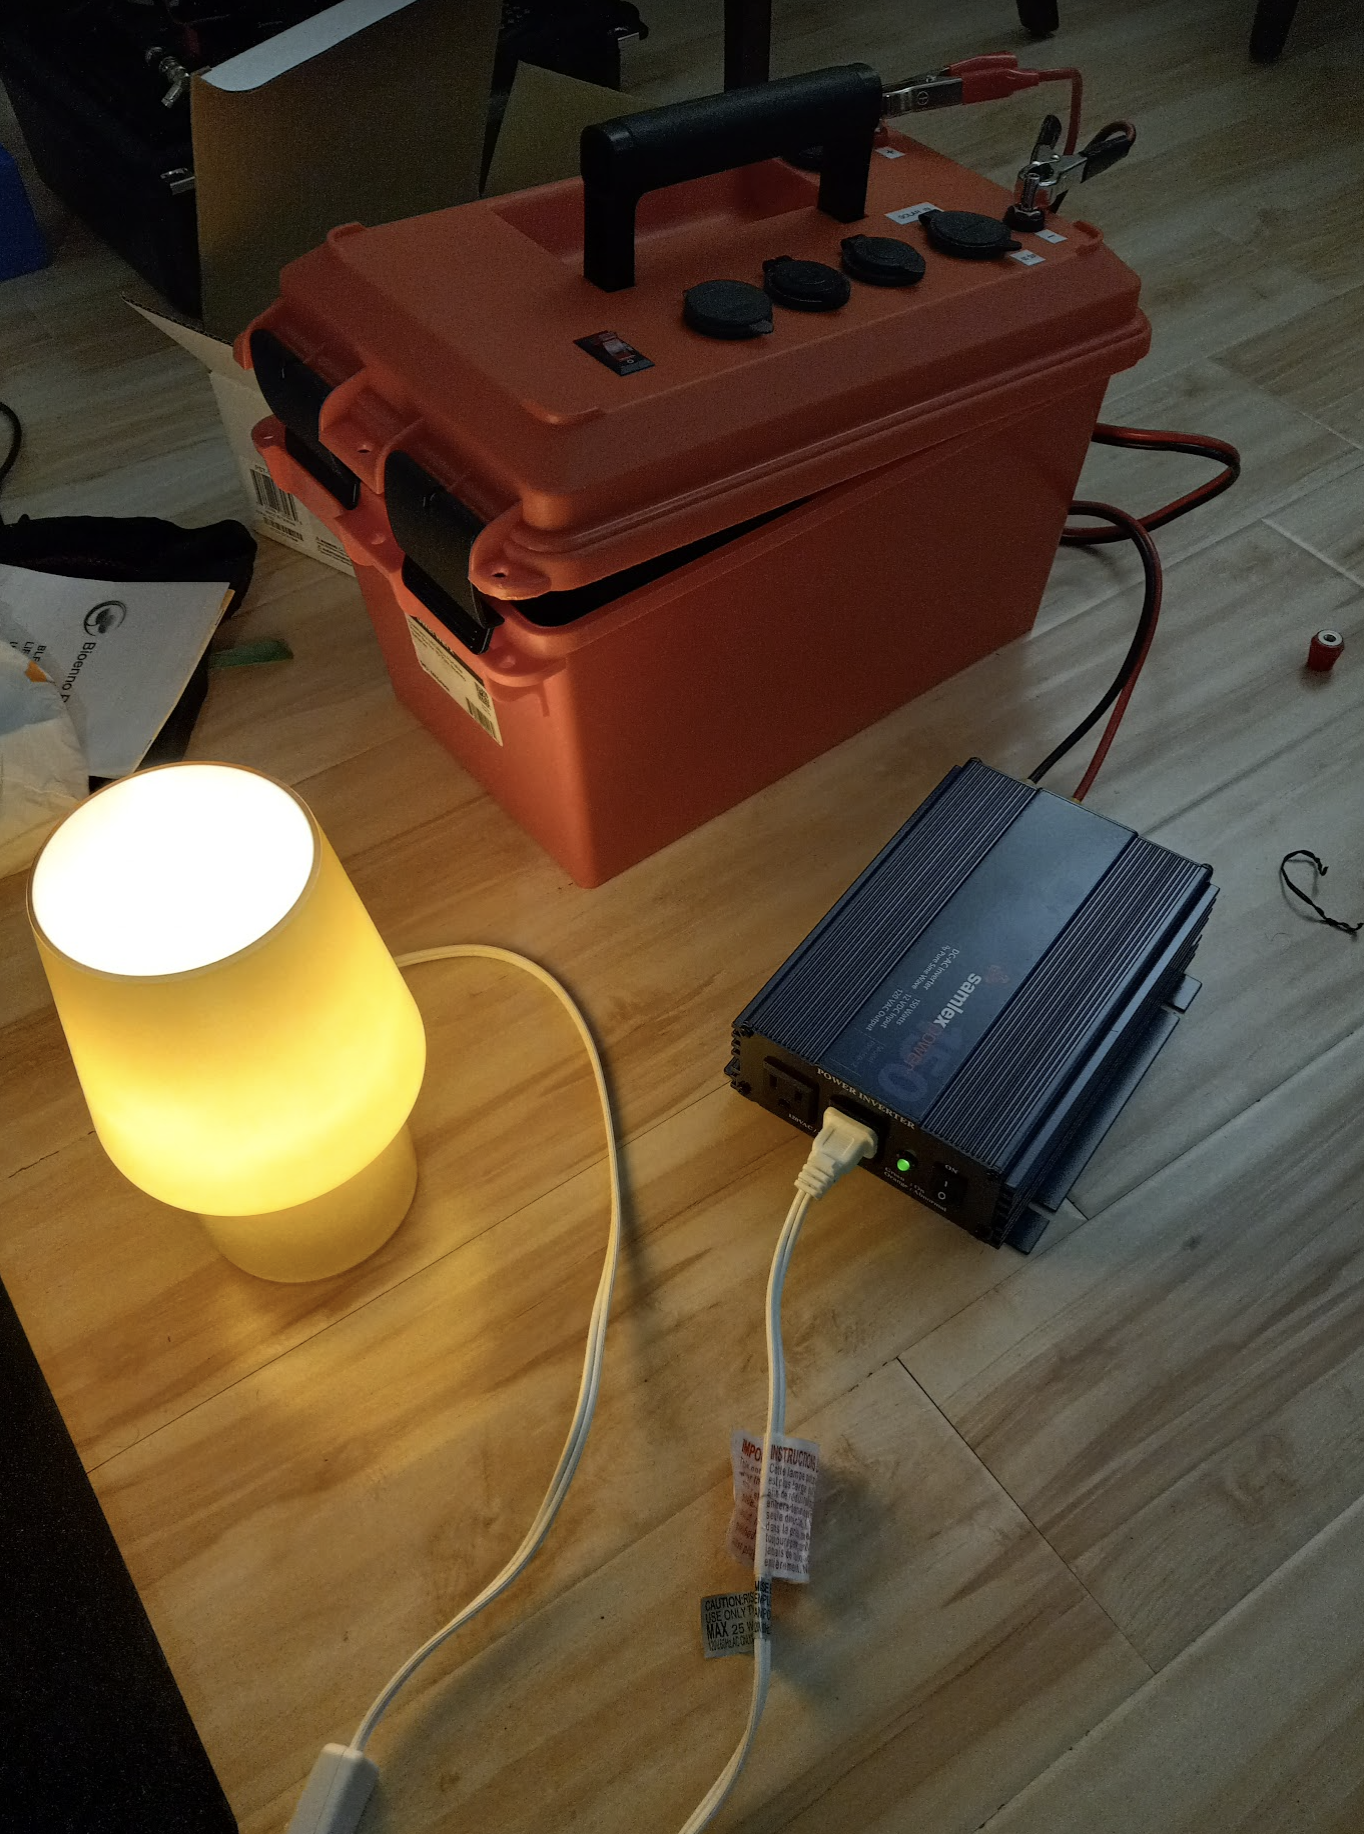
And that’s it! Overall, I am very pleased with it. I use this box regularly for charging devices when I am in the garage, powering my ham radio, providing light when I go camping, and having a peace of mind on road trips. It’s a small tool added to my earthquake kit too. This project was great way for me to learn more about solar, and has inspired me to build a larger 24v system for my shed.